Basement and Nursery Renovations

Home updates/renovations can be the most exciting and the most challenging of times! Like most people, after everything over the last year and a half, we took on a bunch of projects around the house that including finishing our basement, and designing a feature wall for our baby’s nursery.
When we bought our house, the basement was a blank canvas but we had a design in mind. A big playroom for Mason, a gym area, and a “man cave” with a big TV and bar area. My husband did most of the work himself which helped a ton with the renovation costs. We partnered with McMunn and Yates to get all of our basement finishing touches in check!
For the longest time, the basement was 90% complete; meaning it was functional but we didn’t have doors or baseboards. It’s amazing how big of a difference something so small can make! Also, I’ll be honest, I was clueless when it came to knowing anything about doors or baseboards. For instance, I did not know that you had to actually paint these things! I assumed I could walk into the store and buy a white door and call it a day…I was wrong! We purchased the Masonite 6 Panel Textured Interior Doors, and decided to go with the Matte Black Door Handles for the perfect pop of colour. I really wanted something that stood out and not the normal silver handles that we have throughout the rest of the house.

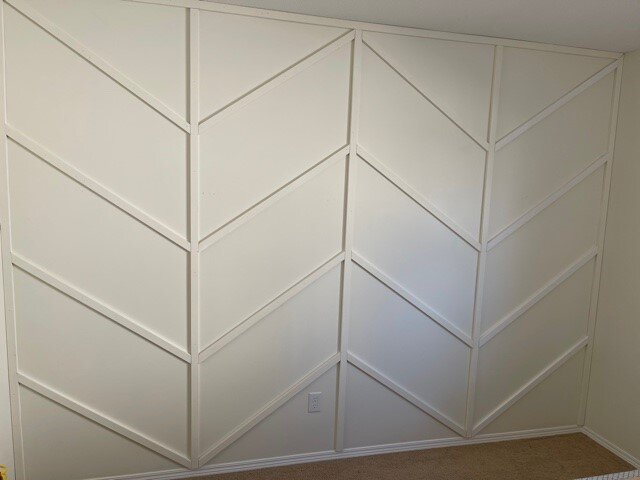
Next up was my favourite project – the nursery feature wall! I had been eyeing up these Herrinbone Accent Walls for months and thought baby boy’s nursery would be the perfect spot to do one! I asked my hubby on a scale of 1-10 how hard he said it was, and he rated it a 4. He said once you had the angles sorted and pieces cut, it was pretty straight-forward.
We purchased 1x2 Pre-Primed MDF Boards for both the vertical and horizontal lines. How many you need really depends on the pattern you want to have. I knew I wanted four sections total, so we did 5 vertical boards and four horizontal boards in each section. We painted the room first and did one coat of paint on the boards before nailing them to the wall as well. My husband used:
· A table saw
· Tape measure
· Pencil
· Nail gun
· Caulking
· Paint
Once the room was painted, the first step was to measure and mark the vertical boards. We started with the end pieces, and measured the middle of the wall from there so it was even. From there, the middle of each section to get all the vertical pieces in place.

We had a rough draft drawn out on how big each section would need to be, so we started marking the wall on where each horizontal piece would need to be placed. Next up was to actually cut the pieces, which took a little trial and error to ensure the boards all fit perfectly. Once hubby got into a rhythm, it was smooth sailing. He used a nail gun to nail in the boards.
Once all the horizontal pieces were installed, my husband used caulking to patch up the nail holes, and sanded them to smooth them over. Once that was complete, we did one more coat of paint and voila! The finished product was everything I had hoped.

Our final project was our basement bar! My husband really wanted a wet bar, and I wanted something pretty and practical! Our Kitchen Craft Cabinets were custom ordered and exactly what we wanted. After a few back and forths (and Instagram polls), we decided on a laminate countertop in Calcutta Marble. With light gray cabinets, we wanted something light but that would still provide a bit of contrast.

To add even more dimension, we wanted a sink and faucet that would really pop. We chose the Blanco Faucet in Cinder, and a matching Silgranit Diamond Mini Sink in the same colour. I’m so happy with the way the bar turned out, and am counting down the days until this mama can enjoy a glass of wine!

